 AnimeGameVerse
Zenless Zone Zero's Angels of Delusion: A Combo Masterclass for Maximum Chaos
Master the Angels of Delusion team composition in Zenless Zone Zero, a trio that orchestrates a symphony of elemental chaos and status effects. This guide reveals how to execute their devastating combo chain through precision timing and perfect synergy.
In the ever-evolving meta of Zenless Zone Zero, few team compositions have captured the imagination and respect of players quite like the Angels of Delusion. This trio isn't just about hitting hard; it's about orchestrating a symphony of elemental chaos and status effects that leaves enemies wondering what hit 'em. To master this team is to embrace a playstyle that's all about precision, timing, and unleashing a devastating combo chain. Forget button-mashing; this is where you need to have your rotation on lock and your synergy game strong. It's the difference between a messy skirmish and a perfectly executed takedown that looks absolutely chef's kiss.

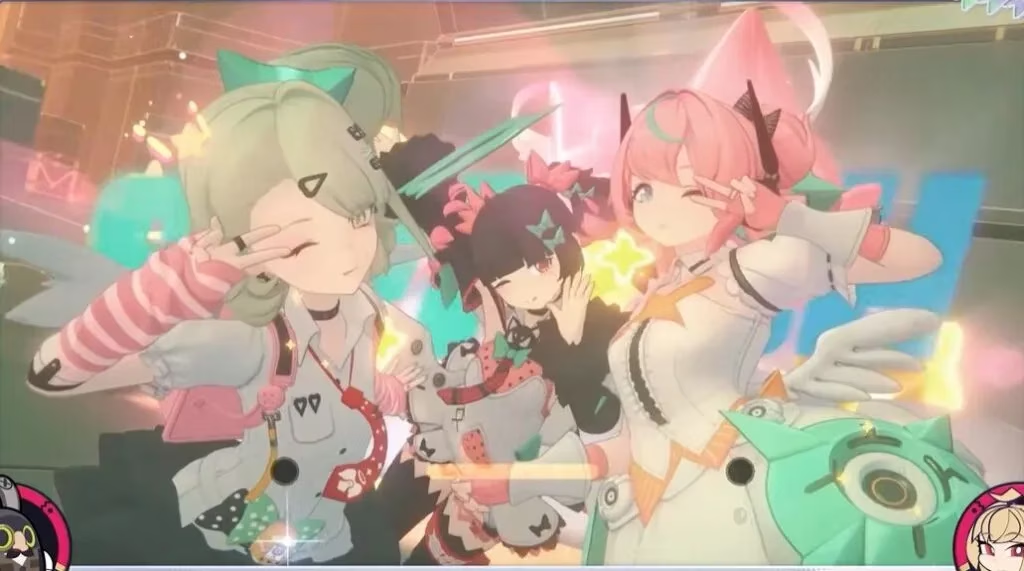
Meet the Heavenly (and Chaotic) Trio
This team lives and dies by the synergy between its three core members. Each Angel has a very specific, non-negotiable role. Trying to swap one out is like trying to make a pizza without cheese—it just ain't right.
Aria: The Main Event
Think of Aria as the grand finale of a fireworks show. She's the S-Rank Anomaly specialist who waits patiently off-field for her moment to shine. Her whole deal revolves around Fandom Power, a special resource she consumes to supercharge her Basic Attacks. But here's the kicker: she's a total diva about her setup. She demands that enemies are already afflicted with an Attribute Anomaly and, ideally, are Stunned. When these conditions are met, her damage goes through the roof, triggering powerful Abloom effects. She's not the one who starts the party; she's the one who ends it with a spectacular, Ether-infused bang.

Nangong Yu: The Master Enabler
If Aria is the star, Nangong Yu is the director, stage manager, and special effects coordinator all rolled into one. As the team's Stun specialist, her job is to set the stage perfectly. She's arguably the most crucial piece of the puzzle. Her kit does a little bit of everything:
-
Applies Stun with heavy Impact damage.
-
Rapidly builds the Ether Attribute Anomaly Gauge on enemies.
-
Massively boosts the team's Anomaly Buildup Rate against Stunned foes.
-
Triggers both Abloom and a unique Disorder effect through her Core Skill.
Her role is simple: get on the field, smash the enemy into a dazed and Anomaly-afflicted state, and then yell "ACTION!" for Aria to take over. Without her, the whole combo falls apart. She's the glue, the facilitator, the real MVP.

Sunna: The Off-Field Cheerleader
Sunna is the team's support, and she's perfectly happy working from the shadows. Her main contribution is the Cat's Gaze effect, which lets her deal Physical damage from off-field whenever allies attack. This not only supplements damage but can also help apply the Physical Attribute Anomaly. Her real value comes from her buffs, particularly Claw Sharpeners, which grants the team a hefty Attack boost based on her own stats. She pops in, drops her buffs and debuffs, and then chills off-screen while the other two go to work. She's the ultimate force multiplier.

The Perfect Rotation: A Step-by-Step Guide to Chaos
Executing the Angels of Delusion combo is a delicate dance. Mess up the steps, and you lose a ton of damage. Nail it, and you'll see numbers so big they'll make your head spin. Here's the optimal rotation, broken down:
-
The Opener (Sunna): Start with Sunna on-field. Use her Basic and EX Attacks to summon Bubblegum and apply Cat's Gaze to the enemy. Then, use a Quick Assist to swap out. This gets her off-field buffs rolling immediately. ✨
-
The Setup (Nangong Yu): Quick Assist into Nangong Yu. Your mission is clear:
-
Build Downbeats points.
-
Use Charged Basic Attacks to pile on Daze (Stun) damage and Ether Anomaly buildup.
-
DO NOT linger. The moment the enemy is Stunned and has the Ether Anomaly applied, your job is done. This is the critical handoff.
-
-
The Payoff (Aria): Switch to Aria. The field should be littered with Fandom Power (generated by the Stun + Anomaly). Now comes the fun part:
-
Spam her Charged Basic Attack to consume Fandom Power, dealing massive damage and triggering Ether Anomaly and Abloom.
-
Weave in her EX Special Attack and Ultimate to generate even more Fandom Power, allowing for more Charged Attacks.
-
Remember, she deals 50% more damage to Stunned enemies, so every second counts!
-
While she's going ham, Nangong Yu is quietly building Vibrato stacks, which will detonate for extra Abloom damage once the Stun wears off. Talk about a parting gift! 🎁
-
-
The Reset (Nangong Yu): As the Stun ends and Aria's power window closes, switch back to Nangong Yu. She can often immediately use a Charged Basic to trigger a Polar Disorder effect, and the cycle begins anew.
Pro-Tips & Important Notes
To truly go from good to godly with this team, keep these advanced tactics in mind:
| Situation | Optimal Play | Why It Matters |
|---|---|---|
| Chain Attack Triggered | Immediately fire off Nangong Yu's and Sunna's Ultimates. | Sets up Ether Veil for a massive team-wide damage boost during the main combo. |
| Aria's Ultimate is Ready | Use it as soon as she hits the field. | It reduces her Fandom Power costs and boosts her damage, making her rotation smoother and deadlier. |
| Stun Management | Be swift! Practice the rotation until it's muscle memory. | Aria's 50% damage bonus to Stunned foes is your biggest multiplier. Wasting it is a cardinal sin. |
| Full Team Synergy | Get all three on-field together during the combo. | Unlocks a unique Angels of Delusion team effect for even more power. It's the secret sauce. |
Mastering the Angels of Delusion is the ultimate test of a Zenless Zone Zero player's skill in 2026. It's a team that rewards practice, punishes sloppiness, and delivers an unparalleled spectacle of synergistic destruction. When you nail that perfect rotation and see the health bars evaporate, you'll know you've achieved combo nirvana. Now, go forth and spread some beautiful, chaotic delusions!
Comments